CERTIFIED, an Adventure in DSLR Cinematography
by John Matysiak
When I was first approached to shoot CERTIFIED, the director, Luke Asa Guidici and I had extensive conversations on why we felt it was imperative to shoot on 35mm, in particular Anamorphic 35mm. The film’s setting was a 1950s rural town in Virginia. Naturally we both knew and understood that if we shot on 35mm it would immediately get us closer to our desired final look. Six months later when it became time to put all the pieces together, shooting on 35mm began to slip further and further away from being economically responsible given our limited budget. After many conversations we ultimately decided to shoot with a PL converted Canon 5DM2. It was far more important for us to have the right lenses and the right lighting package and by choosing a DSLR over a more superior format such as Red MX or an Alexa more money could be spent on lenses and lighting.
Prep
Being that this was a period film and we were going for a very classical look, it was extremely important to have the right amount of camera and lighting support. When most people think of shooting on a DSLR or a 5D they immediately assume it is shooting under available light and “running and gunning,” this film was far from that.
We worked with Alternative Rentals in Culver City. One of the great advantages of renting from Alternative Rentals, in addition to their constant support throughout the project, was having access to Hurlbut Visual Camera systems. These systems come preloaded with specific profiles for different types of lenses, whether it be Canon, Zeiss, or Panavision glass.
One of the biggest hurdles currently with shooting on a DSLR format is the H.264 codec used to record its HD 1080 video. The standard profiles of the Canon 5D and 7D have a high degree of built in contrast and saturation. They’re designed to give the user a solid “out of the box” image. However, if one wishes to do any type of manipulation or color correction to the image in post, this becomes problematic since the “negative” already has built in contrast and saturation. The custom Hurlbut profiles enable you to shoot closer to a “raw” look or flattened (low contrast) image allowing for more flexibility in post. While this might not be important for the average user, for a cinematographer it is essential.
One of the most important decisions a cinematographer faces in a digital age is what lenses to put in front of their sensor. Being that we were going for a Classic Period look we initially looked into using some older vintage glass. I’ve had success in the past using retro fitted PL lenses from the 60s and 70s with various digital formats, but due to the large sensor of the 5D, most of the vintage standard 35mm lenses available didn’t fully cover the full frame sensor. What we ultimately decided on was a set of Arri Ultra Primes. Being modern glass they fully covered the 5DM2 sensor without a problem. Now I was faced with another problem, originally I had wanted older lenses in order to embrace subtle imperfections and varying degrees of fall off that accompany them. However these were some of the cleanest, sharpest, lenses available. To help combat the sharpness of the lenses, as well as the 5DMS itself, I ended up using a combination of filters in front of the lens to achieve our desired Period look. I relied heavily on the Hollywood Black Magic Filter in combination with a set of Mitchelle A,B, and C filters.
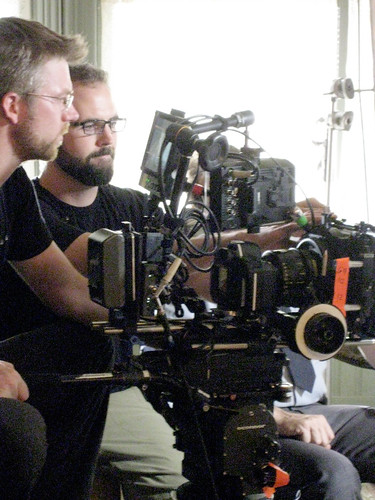
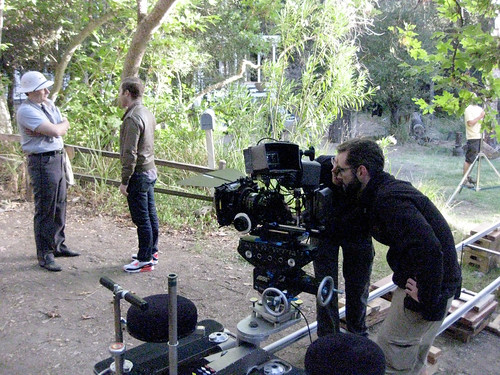
One of the other decisions made early on was to classically move the camera. This meant shooting from a dolly almost ninety percent of the time. We used a Chapman Super PeeWee and Arri 2 Gear head to achieve incredibly smooth moves with our little 5D rig.
Production
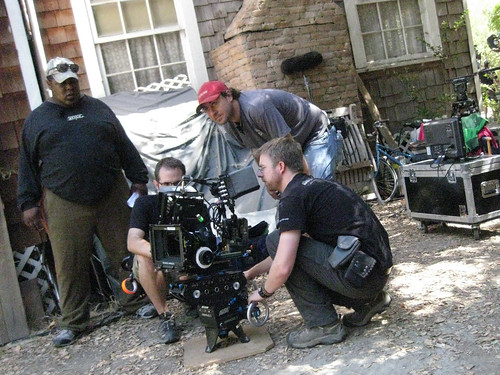
With our custom profiles and Arri Ultra Primes we jumped head first into production. Our location was a rural farmhouse deep in Topanga Canyon. Due to our limited budget, and the nature of the script we were allowed a load in and prelight day followed by a single day of principle photography. I was fortunate enough to have an amazing crew helmed by Matt Iwrin, 1st AC and Nickolas Smith, Gaffer. I’ve had the pleasure to work with them for the past couple of years and I knew that if any crew would be able to pull off an 8 page script in a single day, it was a crew led by them.
We had a pretty minimal lighting package consisting of several 6K Pars and Jokers, and a small 3 ton grip package which included several 12×12 and 8×8, ultra bounces and unbleached muslin. Because a majority of our interior work was confined to one large room with a huge bay window, I knew that the window would act as our key for the scene. Originally my intention was to use several 18Ks bounced into unbleached muslin then chopped and diffused further. However since the budget only allowed for 6K Pars, I ended up going direct and double breaking the 6Ks far away from the window.
We ended up with an incredibly healthy stop of around a 5.6 at ISO 320. This was essential because the 5DM2 with its full frame has even shallower depth of field than traditional 35mm film. My intention from the beginning was to shoot around a 4 / 5.6 which would give the equivalent depth of field you’re used to seeing when shooting 35mm at 2.8 / 4. If I had been forced to shoot wide open, the depth of field would have been too shallow and distracting for our Classic Period look.
We shot our exteriors first thing in the morning and by lunch we had moved inside. We ended up shooting well past sunset and thanks to my gaffer who continually worked ahead of us, we were able to keep consistent ratios once the sun dropped. After a hard fought day we ended up finishing everything we needed. And I believe we managed to get every shot our shot list, a rare thing to have happen for a short film with such a tight shooting schedule.
Post
I knew after we wrapped that we had a pretty solid negative to work with, however since this had been my first time taking a DSLR project all the way through post, I was extremely anxious to get into the color suite and view the film.
Since the Canon 5DM2 uses an H.264 codec to record its HD 1080 video the files had to be transcoded to Apple Proress 422 (HQ) prior to editorial. After extensive testing on both Final Cut Pro, AVID DS Nitris and several other programs we decided to use a software called 5D to RGB. We found it delivered the best results and actually helped smooth out the H.264 codec. Using 5D to RGB along with our custom look up profiles we were able to get the “flattest” image possible to work with in post.
Color correction was done on a Nucoda system helmed by colorist Andrew Drapkin. I was taken aback by the amount of manipulation we were able to do to the negative. It was far beyond what I expected, given the extremely limited dynamic range of the original H.264 codec. I was able to save and bring down certain highlights as well as bring up the toe (low end) of the curve in some places. I believe it was a combination of all three elements (custom profiles, 5D to RGB transcoding, and Nucoda) that allowed us to have such room on the negative and be able to achieve the look we desired.
Conclusion
There was not a single element that “created” the Classical look of the film, it was a combination of custom profiles, great lenses, and shooting at the desired F stop. Not to mention great production design and a director’s unrelenting vision to get it right, from wardrobe all the way down through designing the comic that the main character reads in the opening sequence. Making a short film is truly a team effort. I’m extremely thankful to our amazing crew and production team that pulled all of the elements together to make CERTIFIED such a success.


